


10 simple tips to bring home great travel photos

If I have a professional digital camera slung across my shoulder at a travel destination, I know what will happen: another visitor with a smartphone will decide I must know what I’m doing, and I’ll be asked to take a photo of their family for them.
Every photographer has experienced this. So I smile, take the camera, analyze the sun’s position, ask them to move or turn, size up objects around and behind them, then click the shutter a few times, and hand them back the phone. Response? “Wow, that’s great!” As if I worked some magic as a pro.
But I didn't do anything magical to capture a better image for their memory book. I just tapped into a few easy tricks for taking better travel photos – that for me are now second nature for every photo.

You, too, can bring home better memories, whether you take photos on your smartphone or have some type of digital camera. Just rely on the 10 simple photography tips below for getting more flattering photos when you travel – and your friends will soon be telling you, “Wow, That’s great!”
Find the sun. If the sun is behind your subject, that person or object will likely be nothing but a shadowy silhouette. To ensure your subject is properly exposed, try to get the sun or light source in front of or at least to the side of the subject so it is illuminated better.
Aim for even lighting. Try not to place your subject in a shadow (say, from a building or tree) if everything else is brightly illuminated. Definitely avoid putting your subject half in shadow and half in light. Today’s cameras and smartphones are good, but they will struggle to even out the difference in light – giving you an overly bright or overly dark photo.
Ensure your subject has all limbs attached. Before taking a shot, take one last look at all parts of your subject. Are the person’s toes, hands, elbows, and hat all in the frame? Is the building you want still have its flagpole in the frame? There's nothing worse than a footless mother or a beautiful sculpture with its arm cut off.
Peruse the edges. Every experienced photographer does what's called "edge patrol." That means before you click the shutter, your eye scans the edges to ensure you have all you want in the frame. If not, take a step one way or the other, maybe backward even (do look first!), to ensure there isn’t a tree limb poking out from a subject’s head, or a garbage can isn’t decorating your photo. Sometimes you place a distraction behind a person or tree. Sure, photo editing software can work wonders, but my theory is, why spend the time if you can get it right in camera?
Look for a better snap. How many times have I turned a corner or crested a hill and said, “oh, that’s beautiful,” and snapped a photo. I’m sure you have. But don’t stop there. Now that you have a photo in the bag, go a little farther or around the corner and scan the scene again. Sometimes, a better composition will appear and be even more impressive.

Centering is no-go. Photographers rely on something called the Rule of Thirds. Imagine what looks like a tic-tac-toe board on your camera screen (some cameras even allow you to turn on a grid overlay). Most images are more powerful if the subject is at or near one of the points where the lines intersect (i.e. upper left or right or lower left or right), rather than smack in the center.
Turn off your flash, please. Especially if you are outdoors, this quick flash of light does no good at all. Even at large venues, all you will get is an over-illumination of the immediate area. If you are indoors or at a special event, this bright flash can be very annoying to others, too, and may ruin somebody else’s photo. If you truly need a flash for a specific photo, turn it on for that one click, then turn it back off.
Hold the camera horizontal. I watch people with smartphones and always find it entertaining that 99 percent take vertical photos. Probably because we mostly use our phones in that orientation. Are you looking to capture a memory of a grand landscape or an expansive city plaza? Then you want to turn the phone to what is called “landscape” mode (yup, it’s named that for a reason) so you don’t end up with a lot of street or sky. That one action can transform your photos.
Brims and sunglasses can kill a photo. Now you're paying attention to the first tip about positioning the light in front of your subject, right? Great! But a hat brim or sunglasses can ruin your best effort – especially if just one of several subjects is sporting the accessory. A brim throws a shadow across the face, and sunglasses hide the eyes. If possible, get off the glasses or the hat (or at least have them tip back the brim) to light up a face and eyes. As you know, eyes are the windows into the soul.

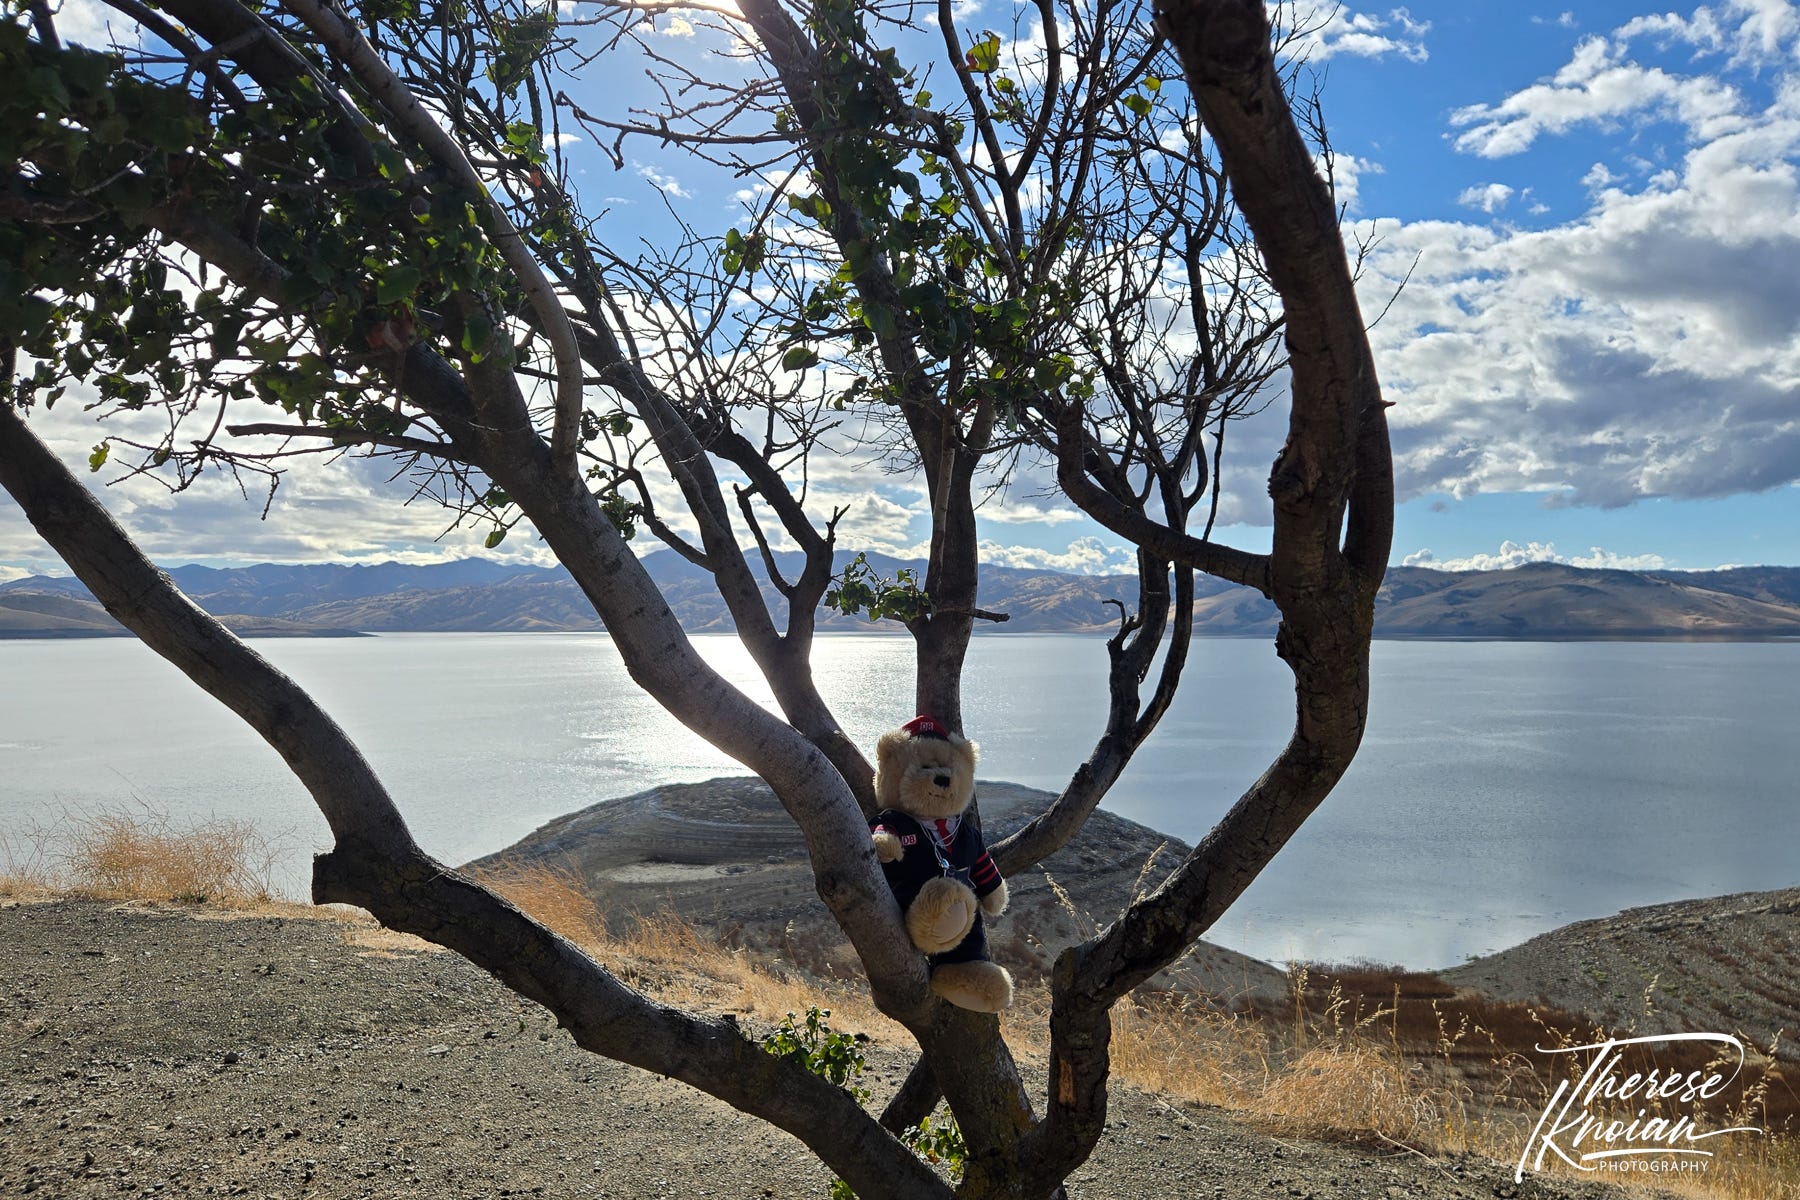
Avoid slicing the photo in half with a horizon. A horizon line smack down the middle of a photo is not so impressive. Take a look at the two examples of “bad” and “good” with my buddy Dieter the bear in the story to see the difference. Before you click, figure out what you want to highlight: a great sky? Then lift your camera to cut out more ground. Beautiful hills or a lake? Then lower the camera to limit the amount of sky in a photo. The photos with Dieter will show you that difference, too!
Of course, as we all know, rules are indeed made to be broken. So get these basic tips down, then let yourself play with them a bit. Maybe you want something smack in the center for an aesthetic reason, or you want a subject half in shadow and half in light for a creative purpose. All of this is fine and can make for impressive images. Just ensure you are doing it on purpose.
What you don’t want is to come home, click through your photos, and moan about how grandma’s foot is cut off or that great lighthouse is missing its top.
Story by Therese Iknoian. See more photos by Therese Iknoian here. They're all available for purchase as gifts or just for you! Free Substack subscribers get 25% off any order! Our paid supporters receive 50% off any order.
A version of this story by Therese Iknoian was originally published on NextAvenue.org and is republished by HITravelTales.com with permission.

How come no comments from Dieter about his experience, as a model?