


18 tips to take amazing travel photos

Travel photography. We’re passionate about it. We love capturing engaging images and videos of our travels because travel photos are memories. Looking at them inspires and allows you to relive adventures, special moments or laughs, and to remember sights and experiences. Anyone can snap photos with a smartphone camera or a point-and-shoot. But becoming a good travel photographer takes practice and the need to acquire some knowledge and have a few tools (Just a little to start perhaps, and then more as you progress or become more involved.)
Learning the 18 travel photography tips in this post is a good start. After that, dive into our excellent and ever-growing series of travel photography articles.
It starts by taking the time to learn to use your camera! It doesn’t matter if you have a smartphone camera or a digital single-lens reflex (DSLR) camera – learn to use the tools you have so when you stumble on that “perfect” photo you aren’t so busy fumbling with dials and knobs that you miss the big moment. And, no, auto or program is not the answer. Read your camera’s manual. Practice at home – a lot (The beauty of digital is the ability to just delete, delete)! Experiment with the settings, and learn what your camera settings do, and don’t do. This is the first and perhaps most important step in becoming a skilled travel photographer.
Understand the rule of thirds
At its most basic, the rule of thirds means as you look at a scene you wish to photograph, you want to see it as divided into nine equal squares (think tic-tac-toe board) with two equally spaced vertical lines and two equally spaced horizontal lines. The rule states that the best or most effective images place the subject or most important parts of the composition along one of the lines or at their intersections. Typically, horizon lines will look best along the bottom third of your image, a primary point of interest (like a person or mountain or building) to the right or left of center.
The rule of thirds is most easily visualized by turning on your grid setting on your smartphone camera or your mirrorless or DSLR. As you compose your photograph, think about what the most important elements and points of interest are in the image you want to capture and where you will place them within the grid. Do not be afraid to move as you look at what is important in the scene you are trying to capture. And don’t be afraid to break the rule as you get more comfortable with the concept since rules are, as they say, made to be broken.
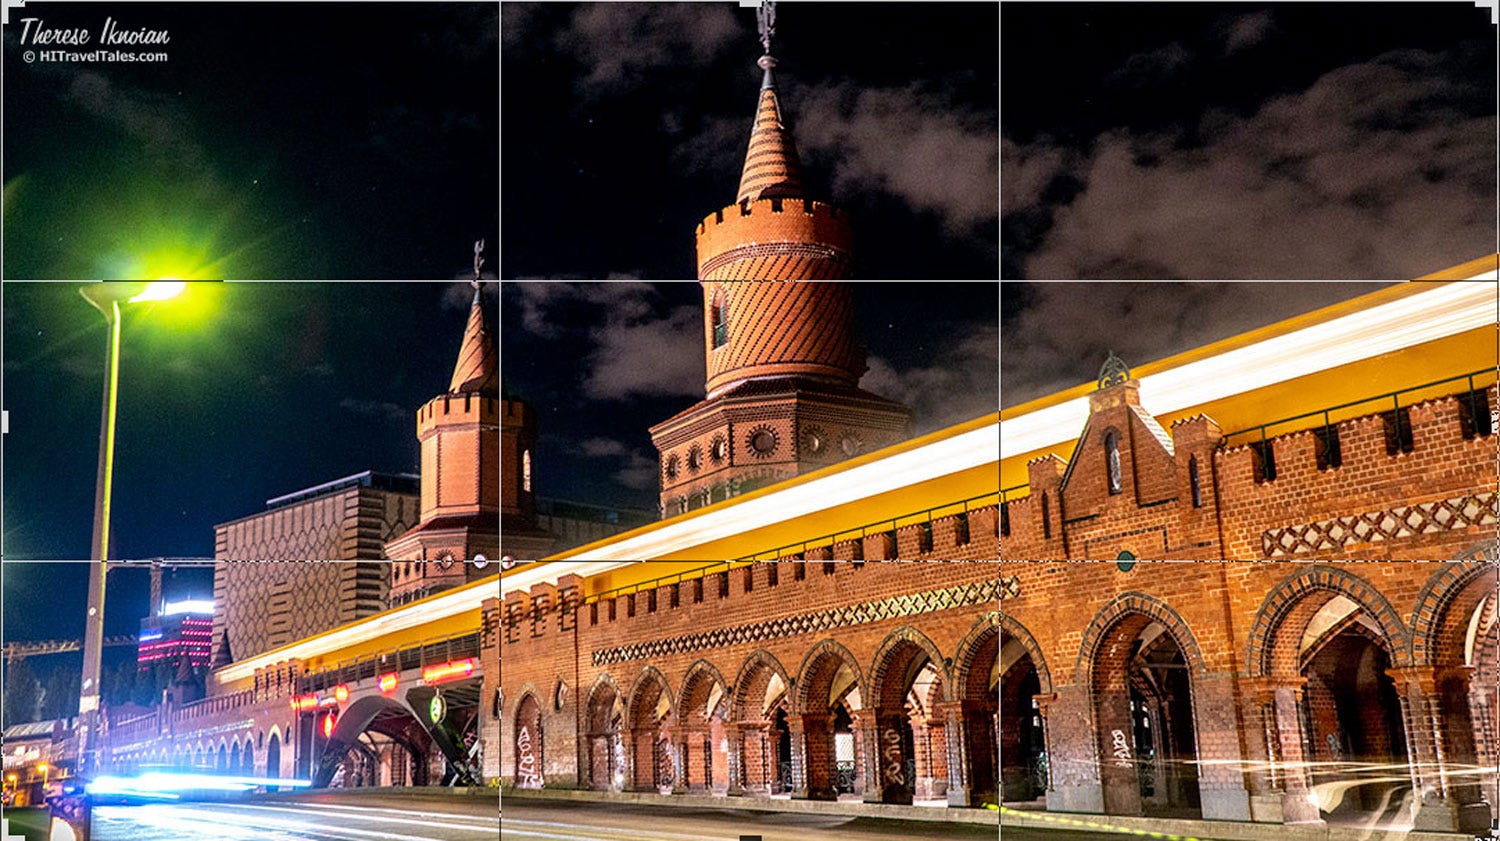
One of the most important travel photography tips is learning to use the rule of thirds, then knowing when to break the rules. Here, Therese has a perfectly composed night shot of the Oberbaumbruecke in Berlin.
Which brings us to camera angles
A good travel photographer can take a photograph of something that hundreds of others have taken before and make it look amazing, simply by thinking about a different way to look at the scene. Envision how your photo might look if taken from another angle (to the right, or left, higher or even lower). Therese often lies on the ground or squats low to shoot up at a subject, creating a compelling image.
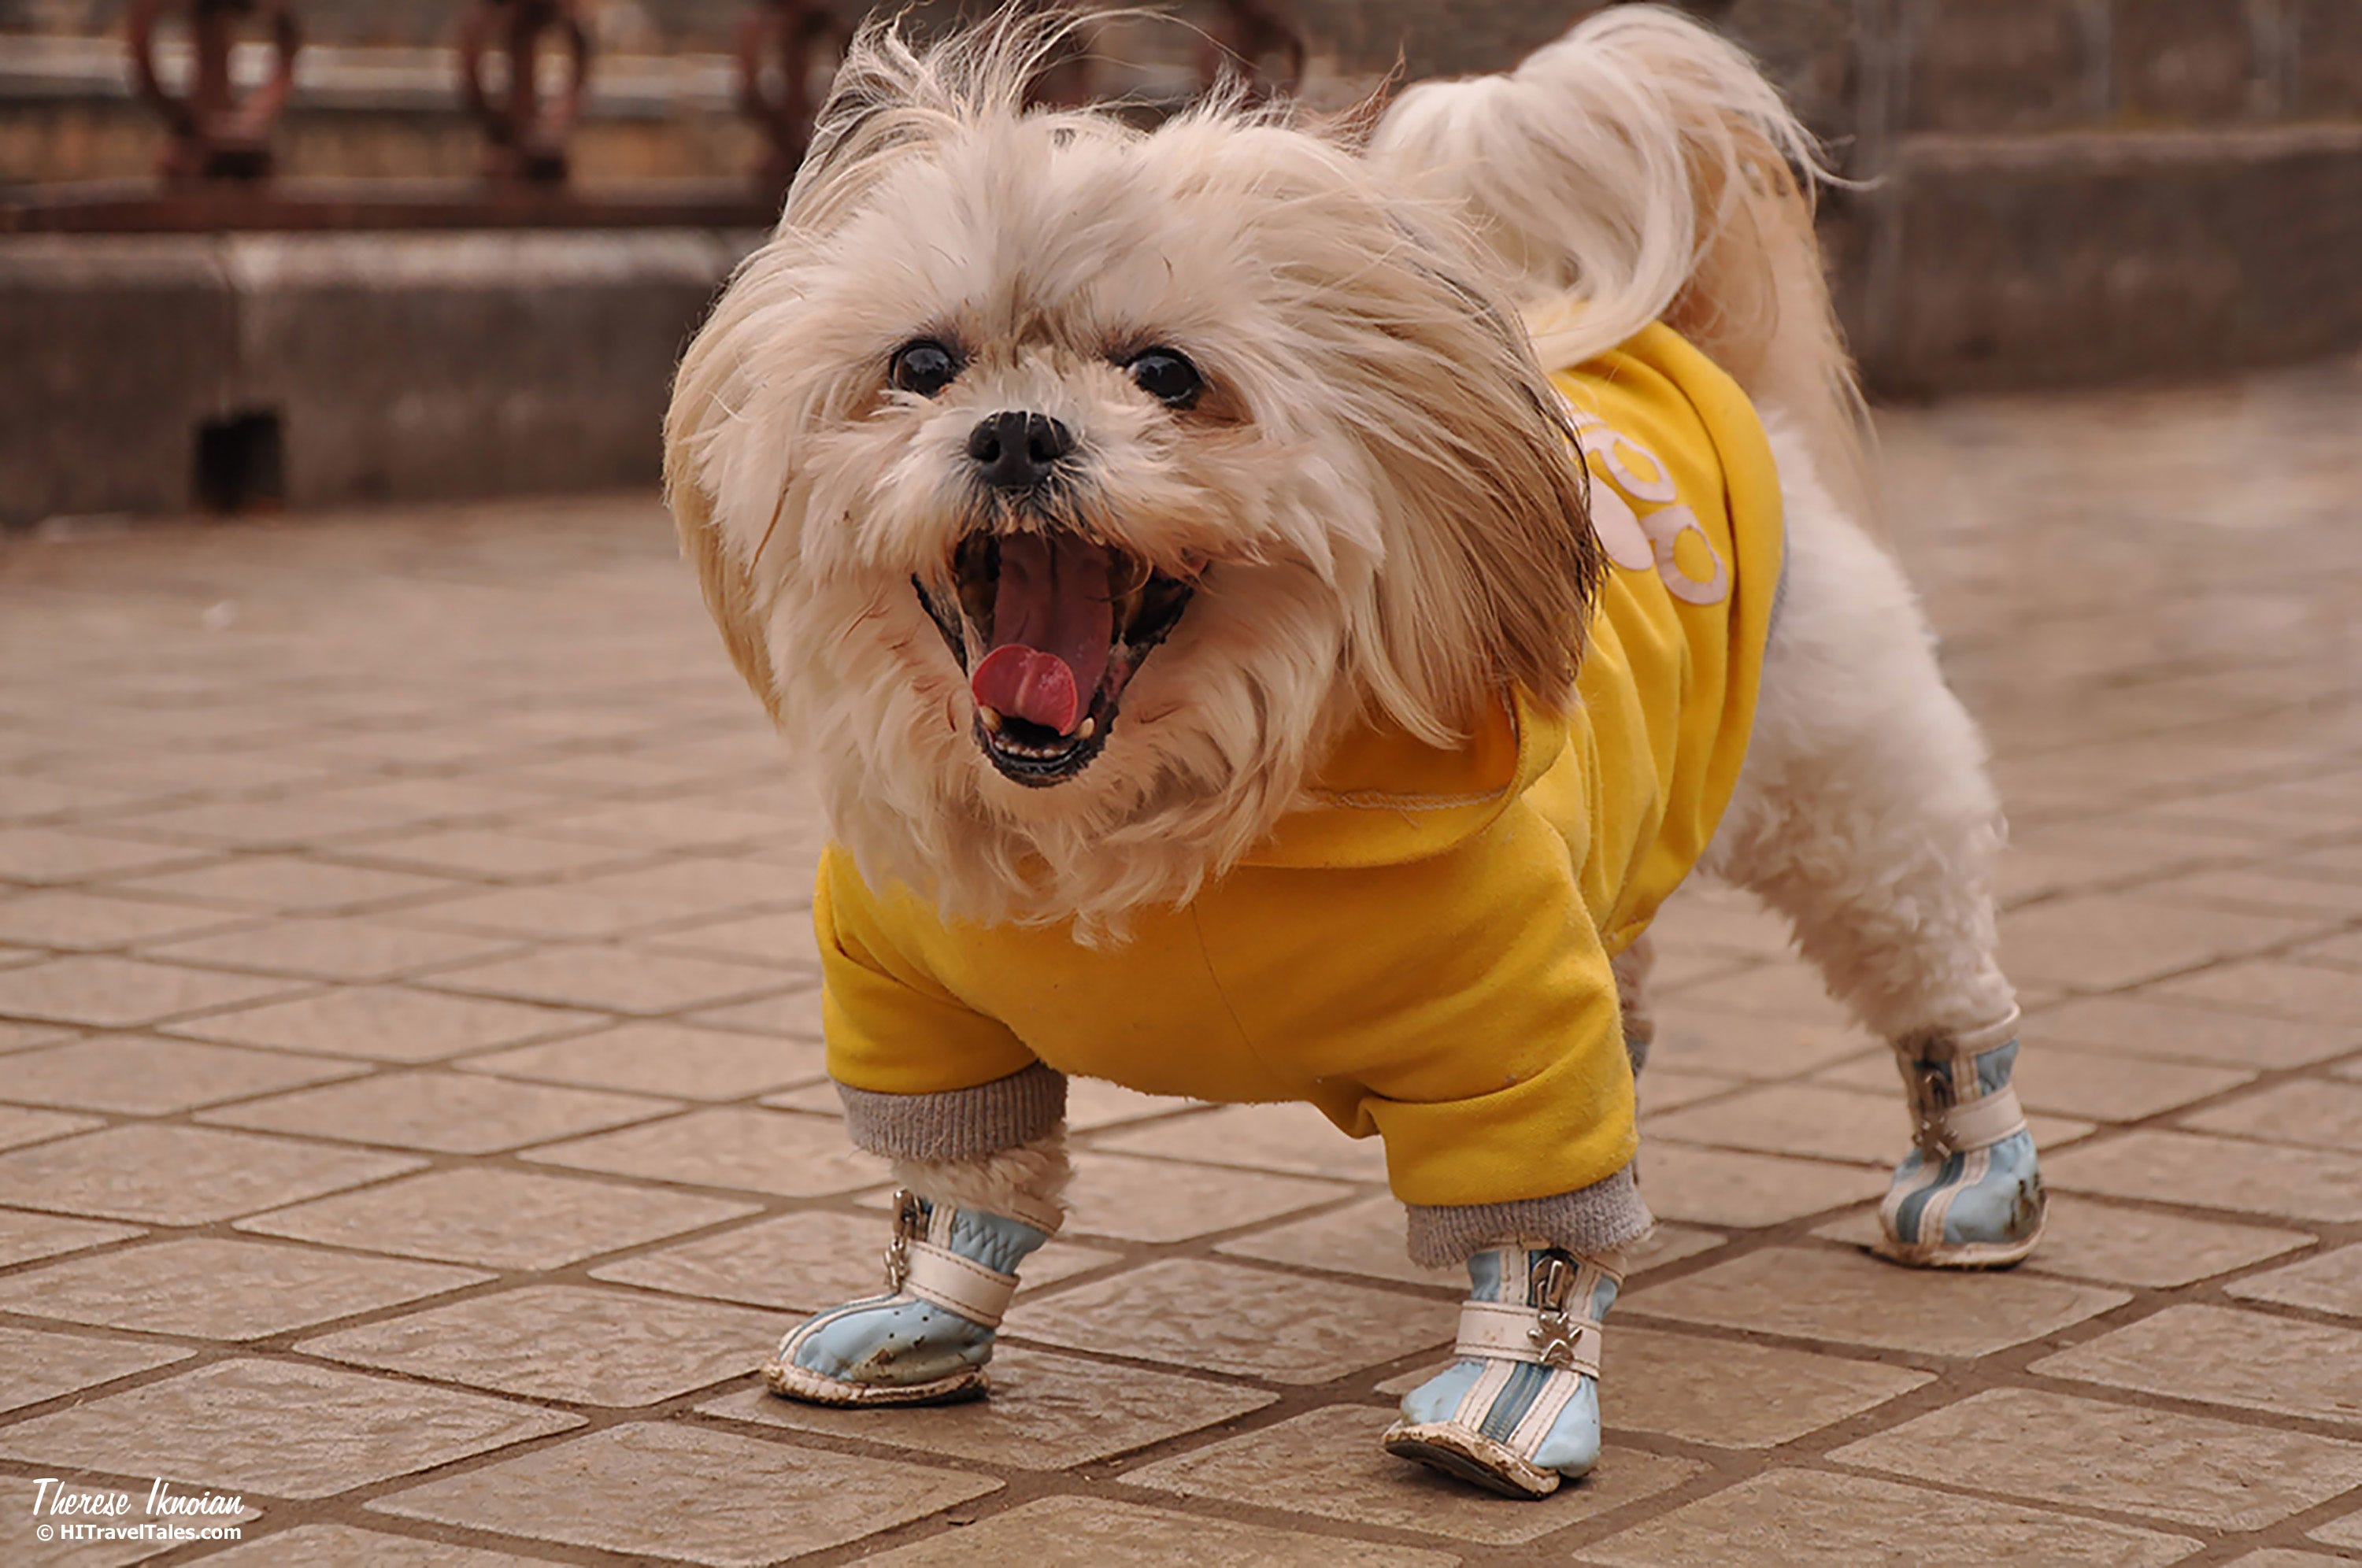
Sometimes a travel photographer has to get on the ground — literally — as Therese did here at dog’s eye level to capture this photo of a dog that appears to be laughing.
Don't forget about perspective
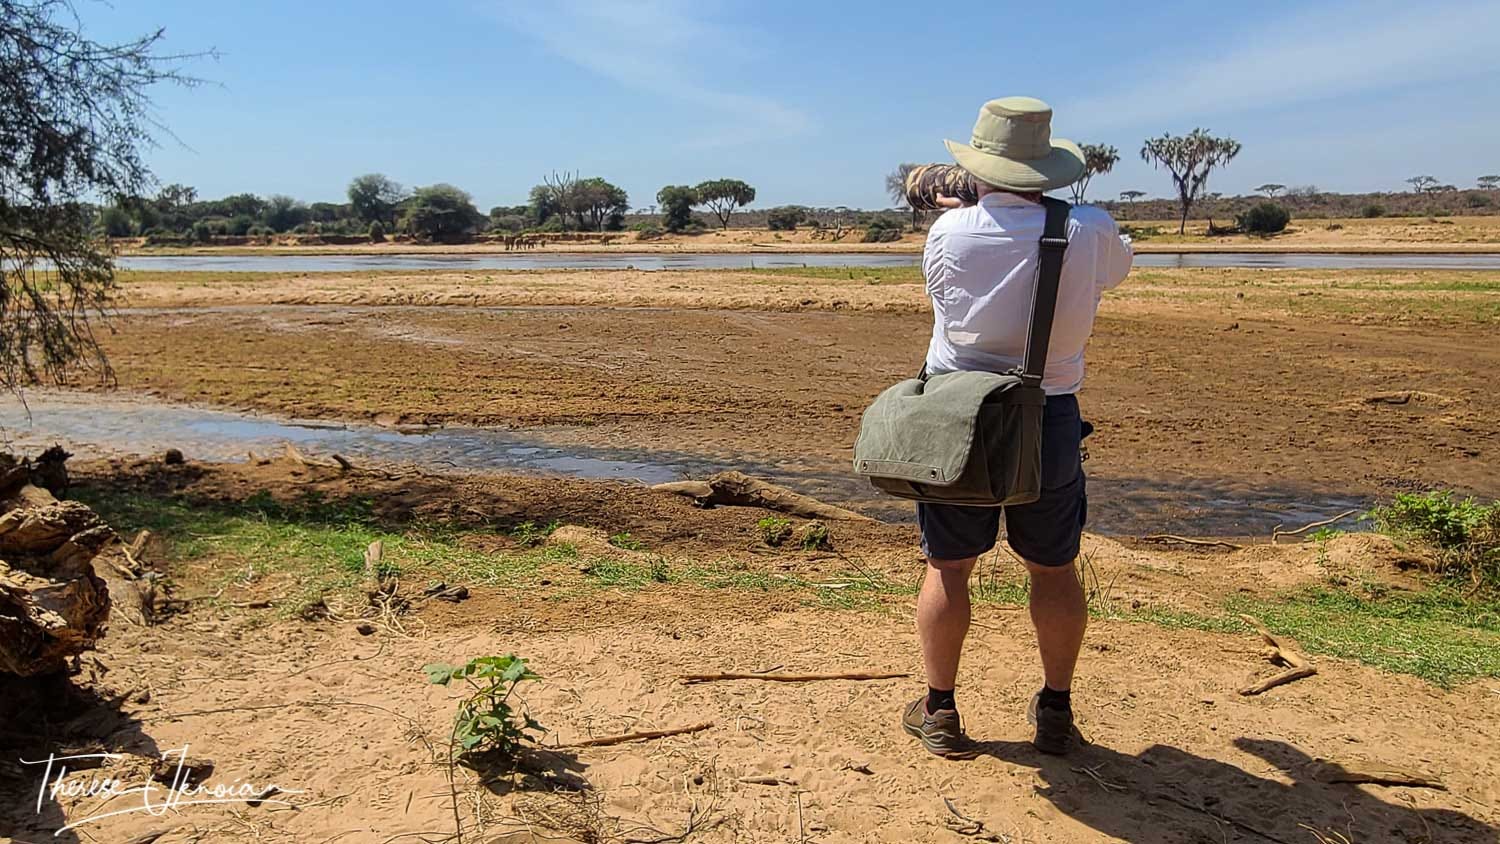
An expansive landscape or cityscape can end up looking rather mundane, even flat, unless you add some perspective to the photograph. Adding perspective can help anyone viewing your photo better see the expanse of land and sky or buildings and streets that moved you to snap the pic. This can be in the foreground, far in the distance, or next to a particular object in the photo. Sometimes a travel photographer has to be very patient and wait a bit for the right person (or animal) to appear.
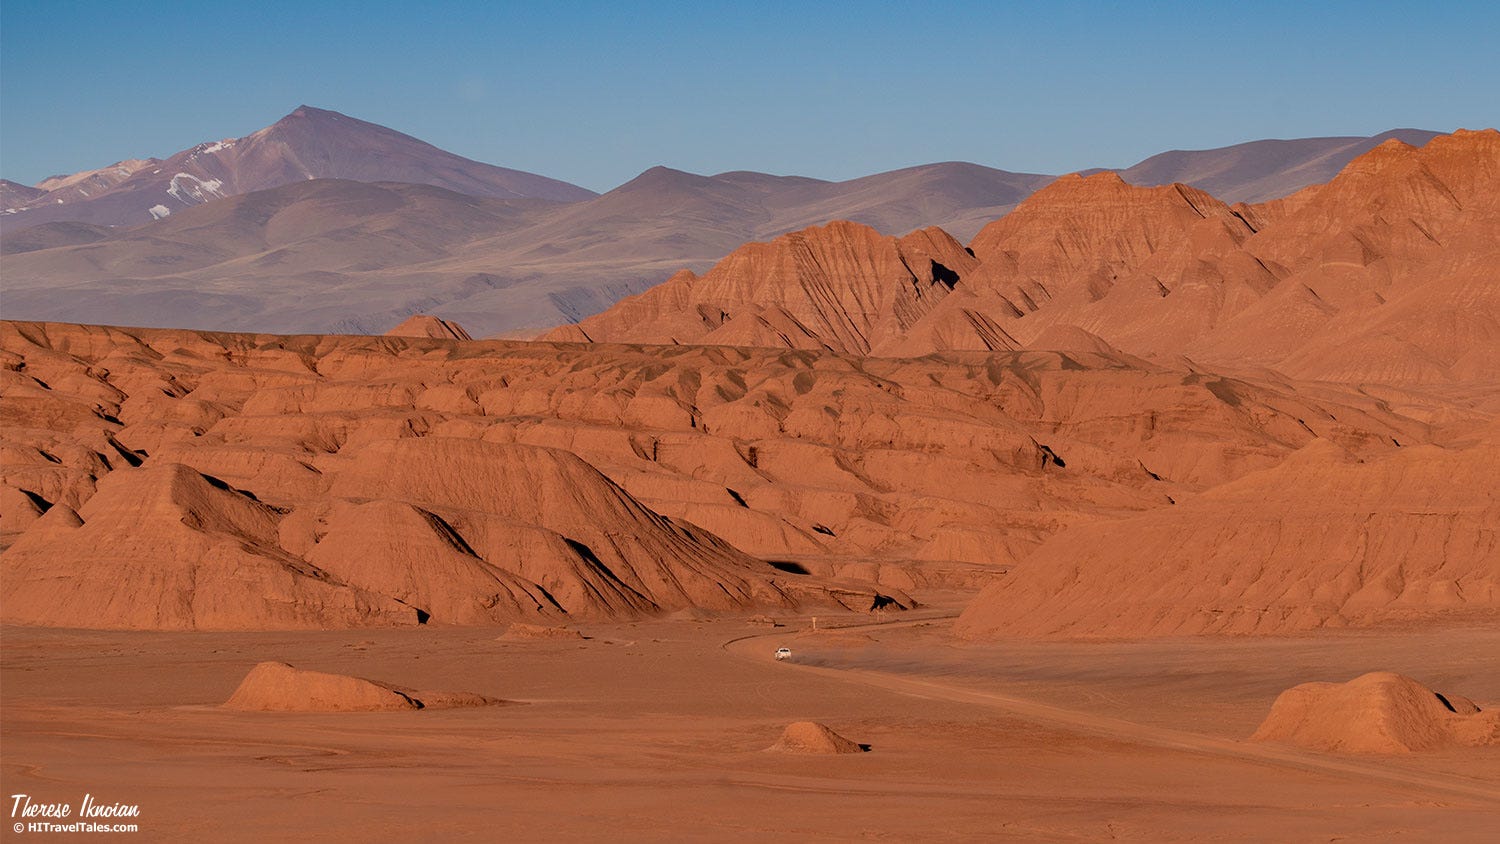
The vastness of the Red Rocks in the Puna in northern Argentina is captured perfectly by Therese, using a small white truck leaving a trail of dust to show the scale of the landscape. Flat desert, red rocks and the Andes in the distance.
Know what time it is
The “golden hour” is a favorite time to take photographs for good reason. During the golden hour (defined loosely as about the first and last hour of sunlight in a day) the sun’s position in the sky produces a softer and warmer light and generates longer shadows. Early morning and around sunset, too, are times when a travel photographer can best capture inviting images of a village coming to life or transitioning into evening. On the other hand, midday typically produces flatter and more harsh light or even awkward mixes of shadow and light. But that doesn’t mean you should tuck your camera away. Learn to work with shade, backlighting and filtered light (like in a forest) to still capture compelling images. And try a polarizing filter for middays when light is harsher.
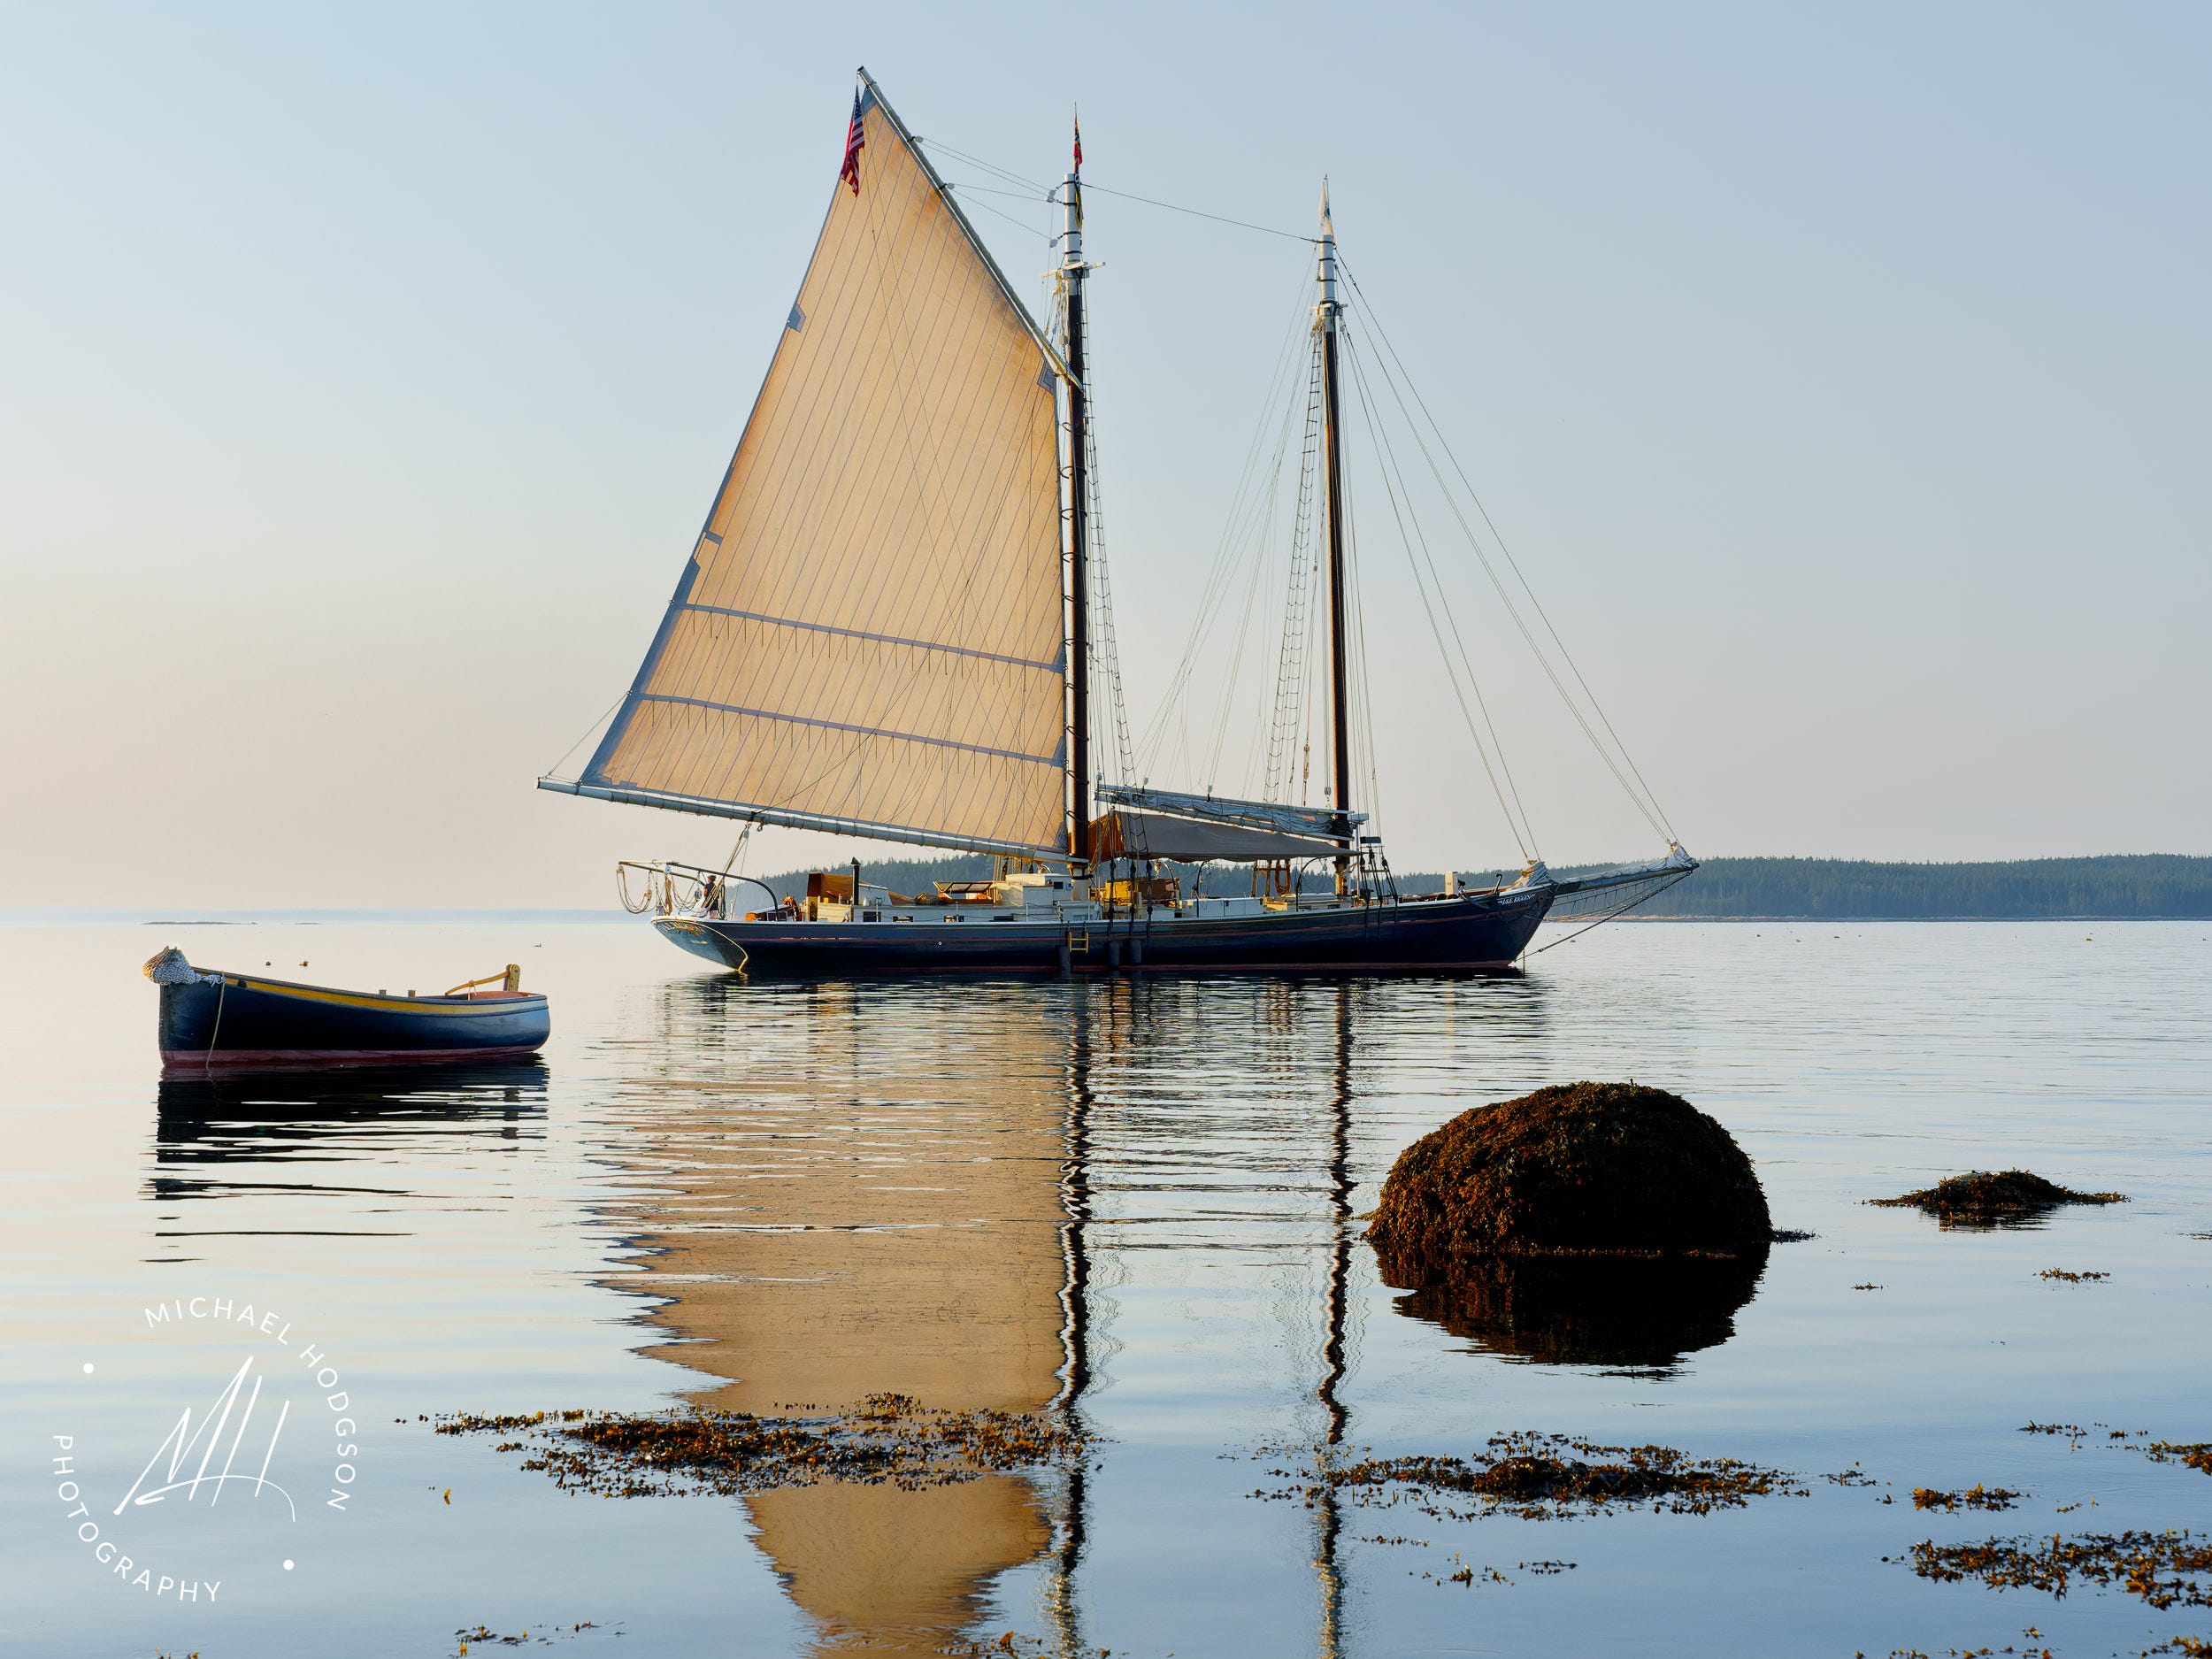
This image of the historic J & E Riggin schooner at anchor off Marshall Island in Maine was taken with golden light during sunset that perfectly backlit the sail in a warm glow that helped make the colors pop and the image appear more vibrant.
The magic of silhouettes
Silhouettes are a type of shot that can be produced almost any time of the day as long as there is a bright light or background behind the subject. There also needs to be a strong contrast between the background and the subject the travel photographer is trying to shoot. This leaves a darker subject and a brighter background that can, in the right circumstance, be very spectacular.
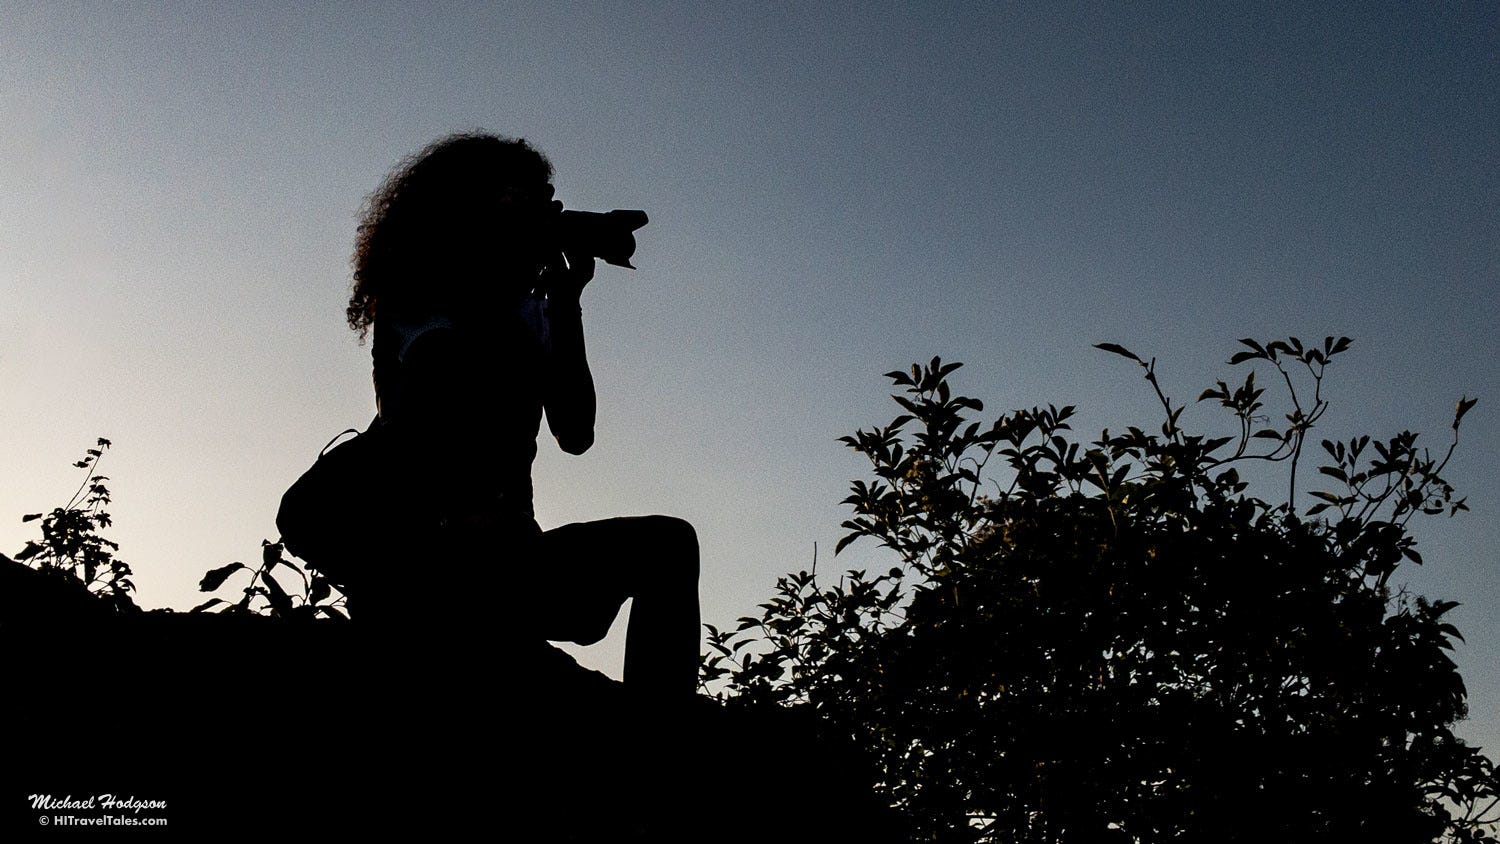
As the sun rose behind Therese taking photos above the town of Dürnstein in Austria, Michael moved below Therese so he was looking back and up into the sun’s light to capture this silhouette in sharp detail.
Become part of what you are photographing
There are times where you will want or need to become an active participant in order to be able to take the photographs you want. Getting right into the middle of the action or moving in to interact closely with people. Therese is very good at engaging a person or people in conversation and laughter while taking photographs of them at the same time.
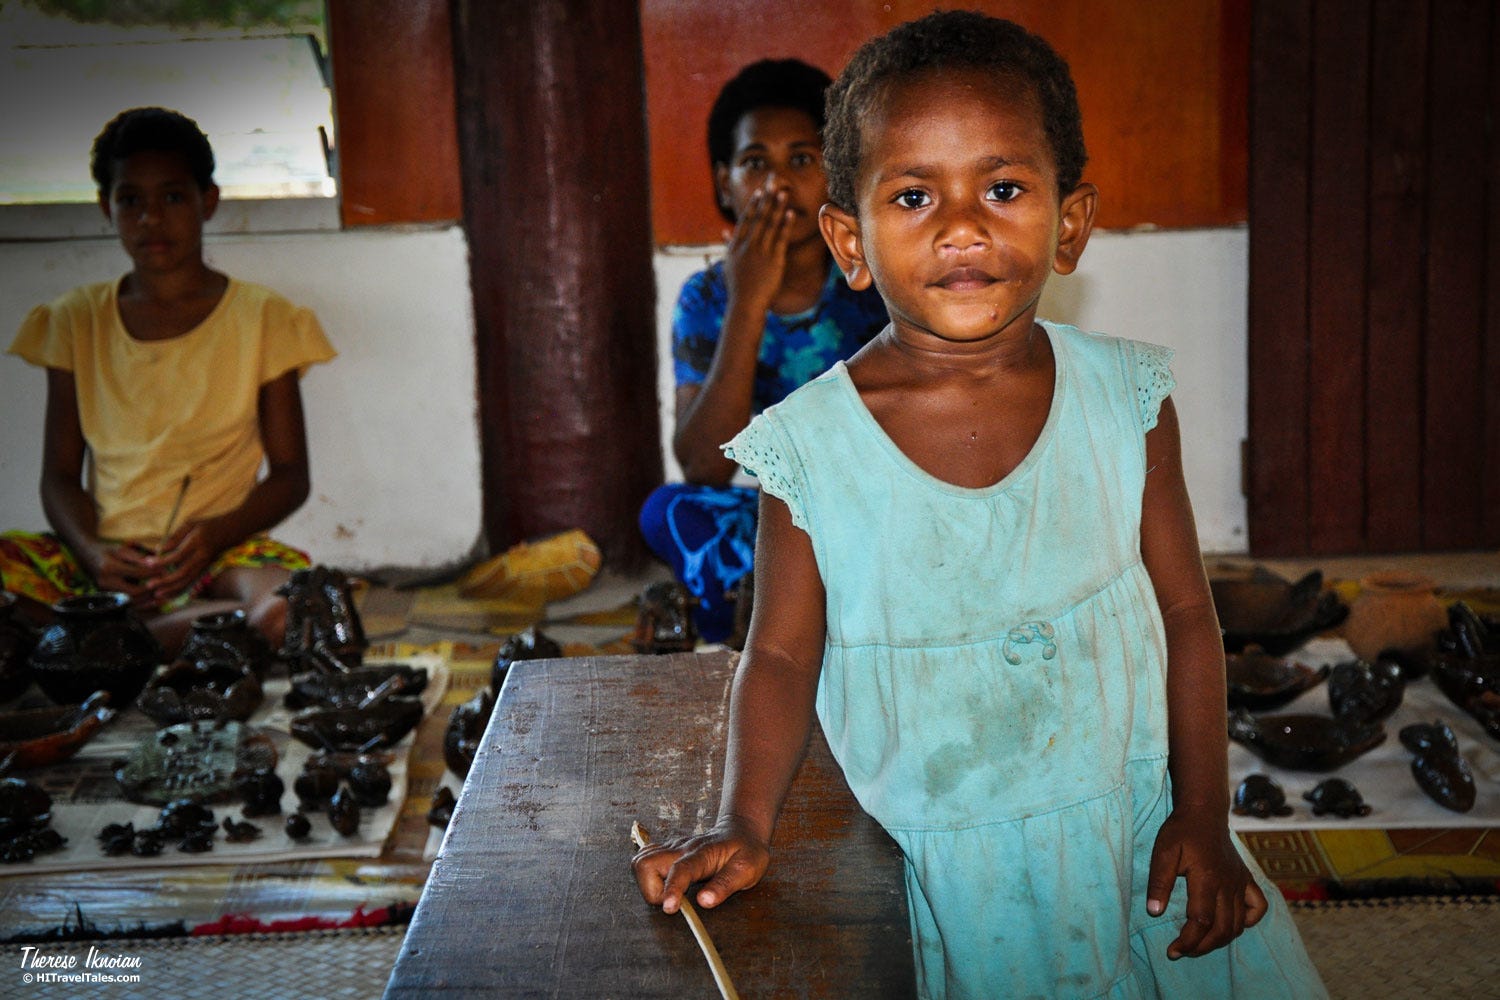
Therese bonded with a little girl at a pottery-making village in Fiji and, after interacting and developing trust, was able to take this very personal photograph.
Get creative with your photo
Get creative with your photo. Sometimes, the most memorable photo is an image where the photographer was thinking outside of the box – seeing details in a potential photo no one else had. Like shooting a photo of a parade coming toward the camera by lying on the ground and using a fish eye lens (never do anything that would put your safety or others at risk). Or looking down at a scene to provide a unique view giving your image a sense of style and place. Think getting up, getting down, going around the side or even behind.
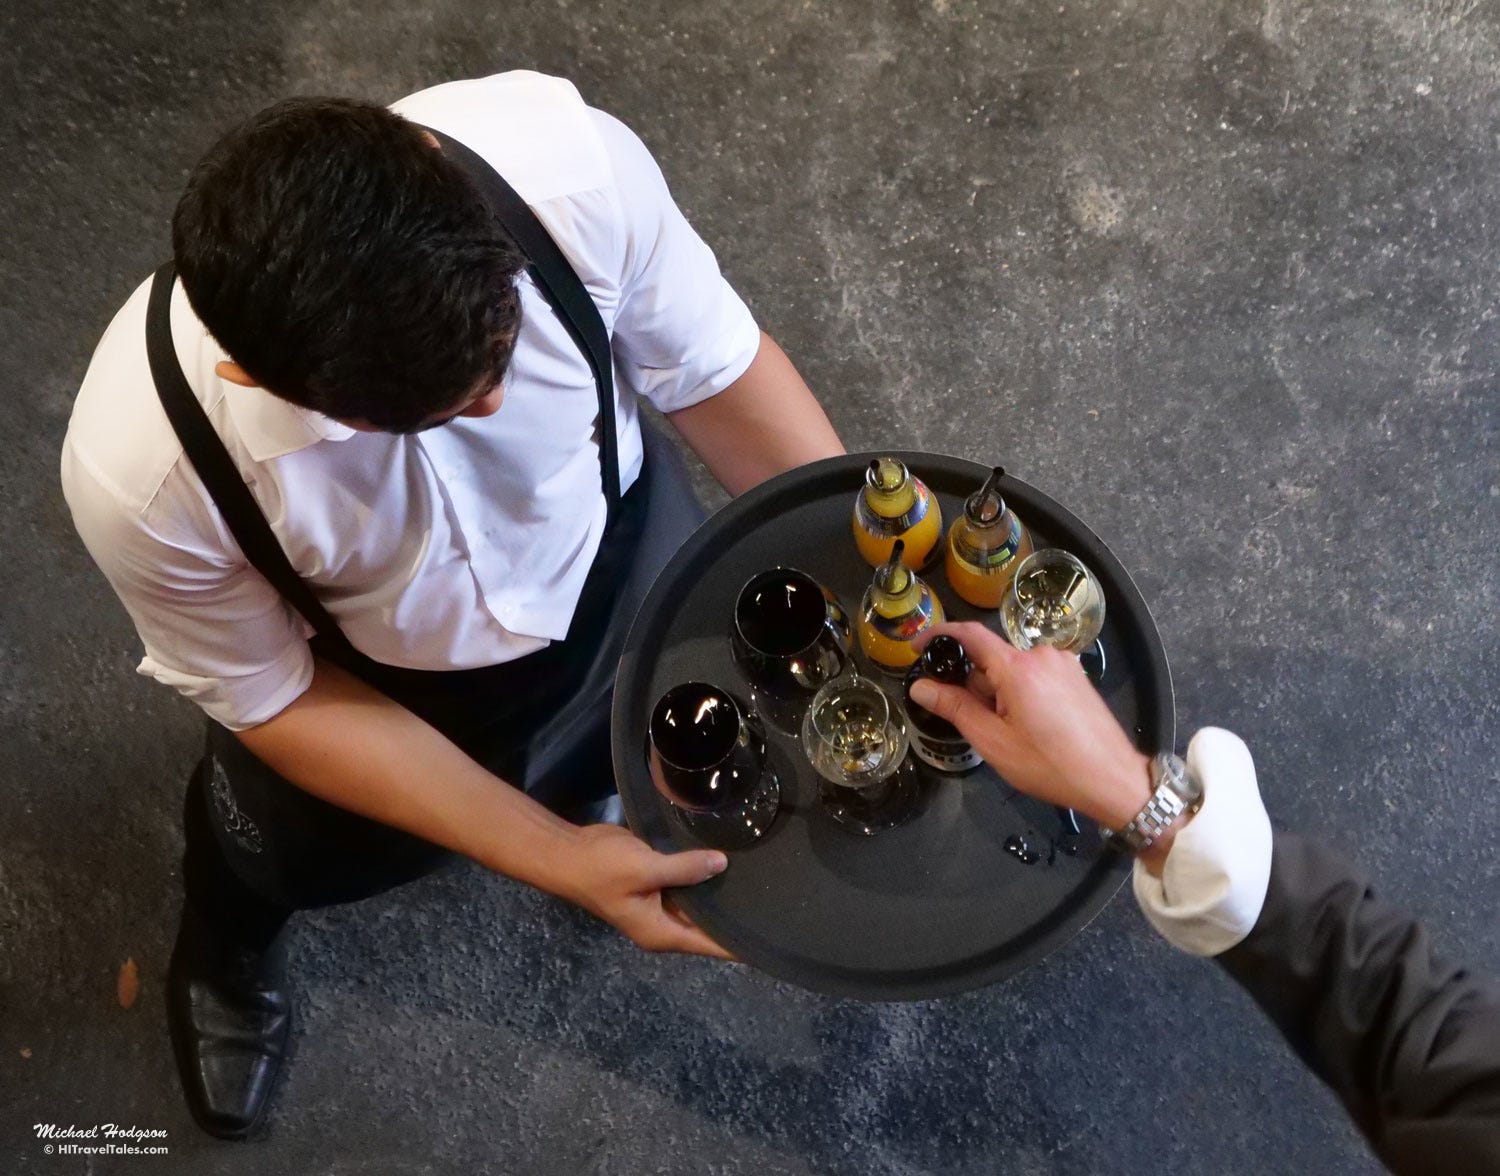
At a grand opening party for Urban Nation in Berlin, Michael wanted a photo of the waiter greeting people with a tray of drinks that was more than a snapshot. So he went upstairs, leaned over the rail, shot downward, and waited until a hand appeared in the frame for some added action.
Edit and process your photos
Photographers used to use darkrooms to process their photos. Now, in the digital age, we use post-processing software like Photoshop or Lightroom. This doesn’t mean you should now feel free to add a different color sky, insert things into a scene that weren’t there (like a rainbow for example), or so over-process and color your image it looks ridiculously fake. Post-processing software is there to fix small details on an image – lighten a shadow, add a highlight, crop out unwanted parts, re-size or, in some cases, remove a distracting sticker on a sign or a shadow. There are easy-to-use but basic photo editing apps for your smartphone camera as well.
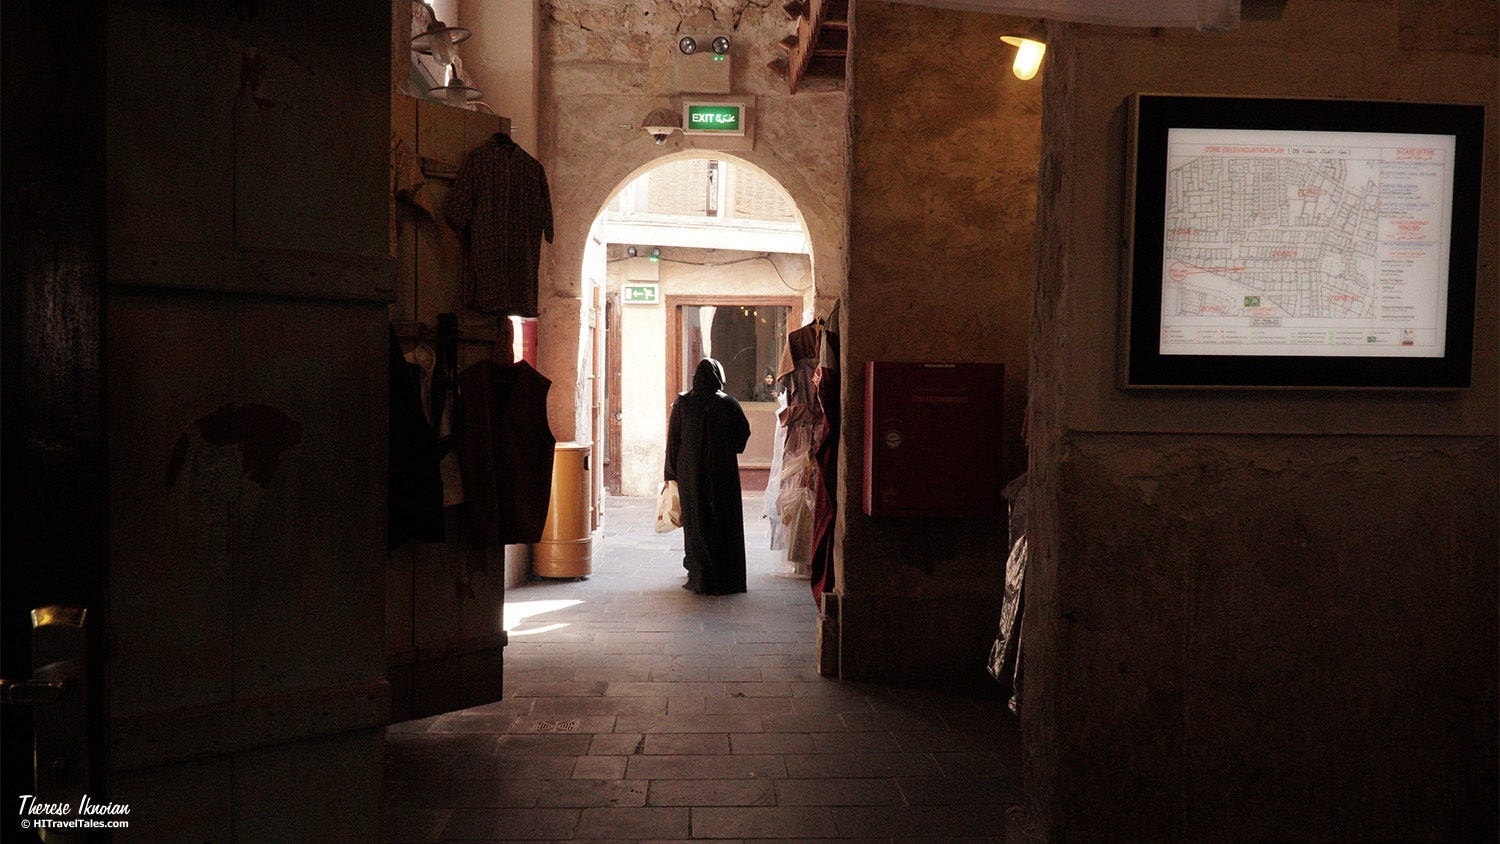
Before processing: In a split second this woman passed through an arch in the souk in Doha, Qatar, and Therese grabbed the shot, knowing it just would need a bit of massaging.
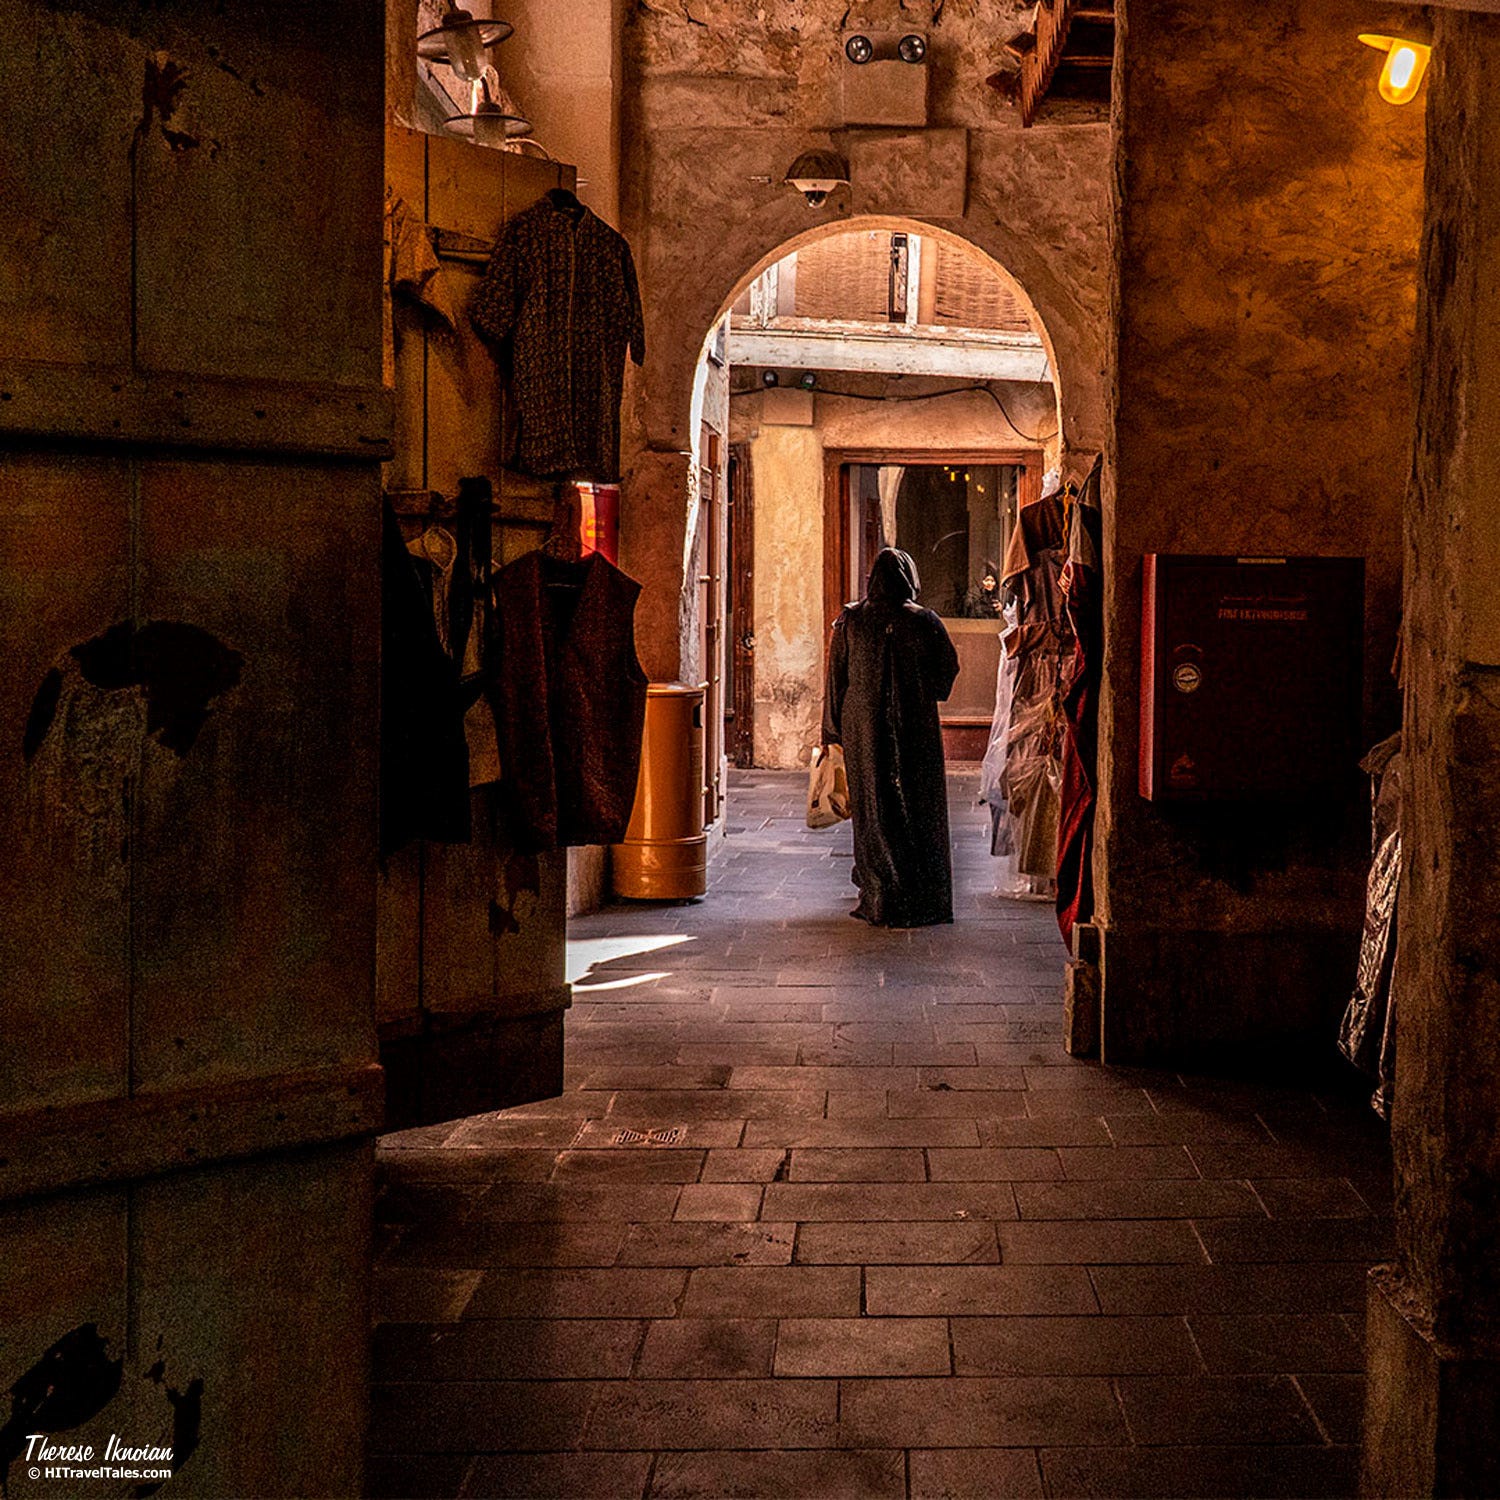
After processing: A little contrast, increased exposure, dropped highlights and opened shadows, not to mention a crop, the shot becomes very appealing.
Anticip-wait
Although a part of waiting – thus Therese’s word “anticip-wait” — this means not just passively hanging out waiting for the man in the sun to flip the newspaper page but watching his eyes to get a feeling for that next flip. Or being on a street with a backdrop you want and looking around for just the right passer-by to accentuate the scene and anticipating that person’s arrival. This means being an active part of the composition and components and not just letting them happen to you.
Attending a children’s Carnival parade in Altstatten, Switzerland, in (known as “Fasnacht” there), all the little ones were tossing confetti. So Therese got down to their level and waited, anticipating a toss in her face i.e. lens. Several tosses targeted her wonderfully (manual focus demanded here!), but this little girl covered her with blue and white flecks while she stared right in the camera.

Take a backseat
So to speak. In other words, the real photo may be of somebody taking a photo, or a crowd watching something happen, or a band from behind. Don’t hesitate to walk around behind the scene or put something between you and the attraction. Sometimes that bit of humanity or “disruption” makes for a much more interesting and improved scene.
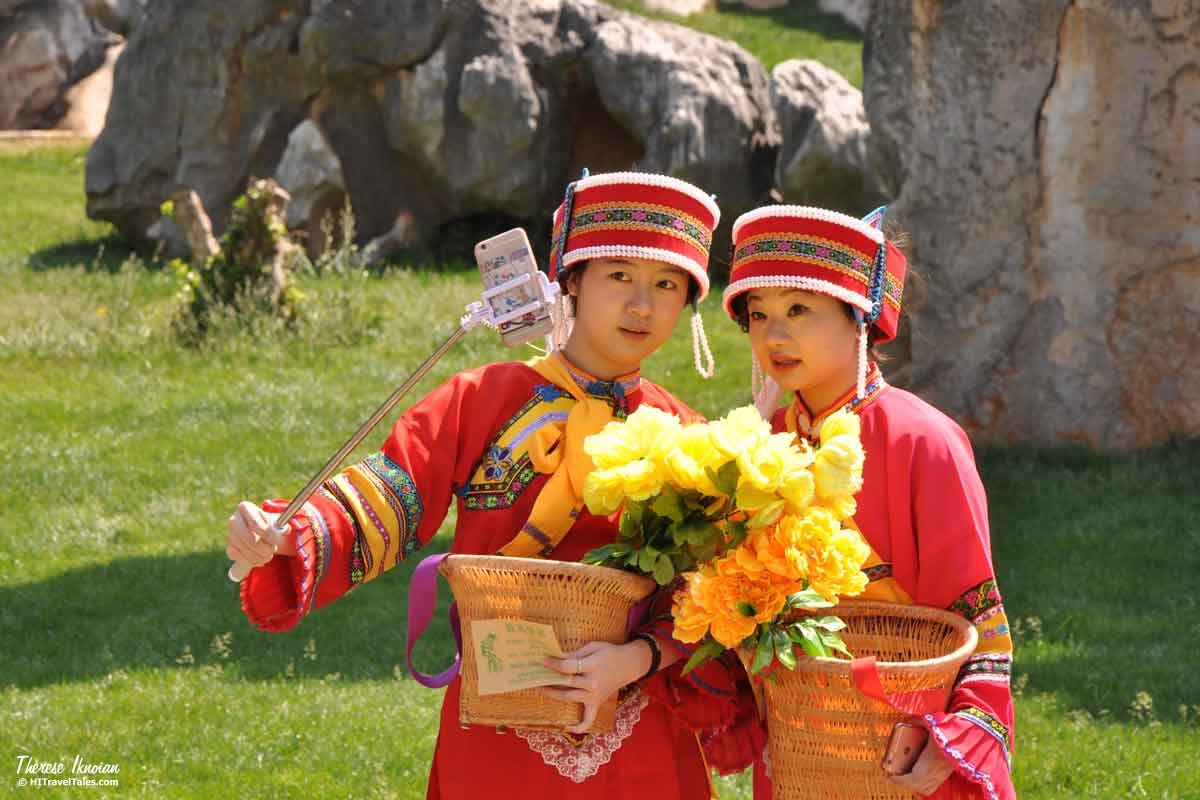
Here, at the Stone Forest in the Yunnan Province in China, visitors can check out period costumes and parade around in them, taking photos of themselves. That’s what these two young women had done, and they were quite enjoying their selfie.
Be ready
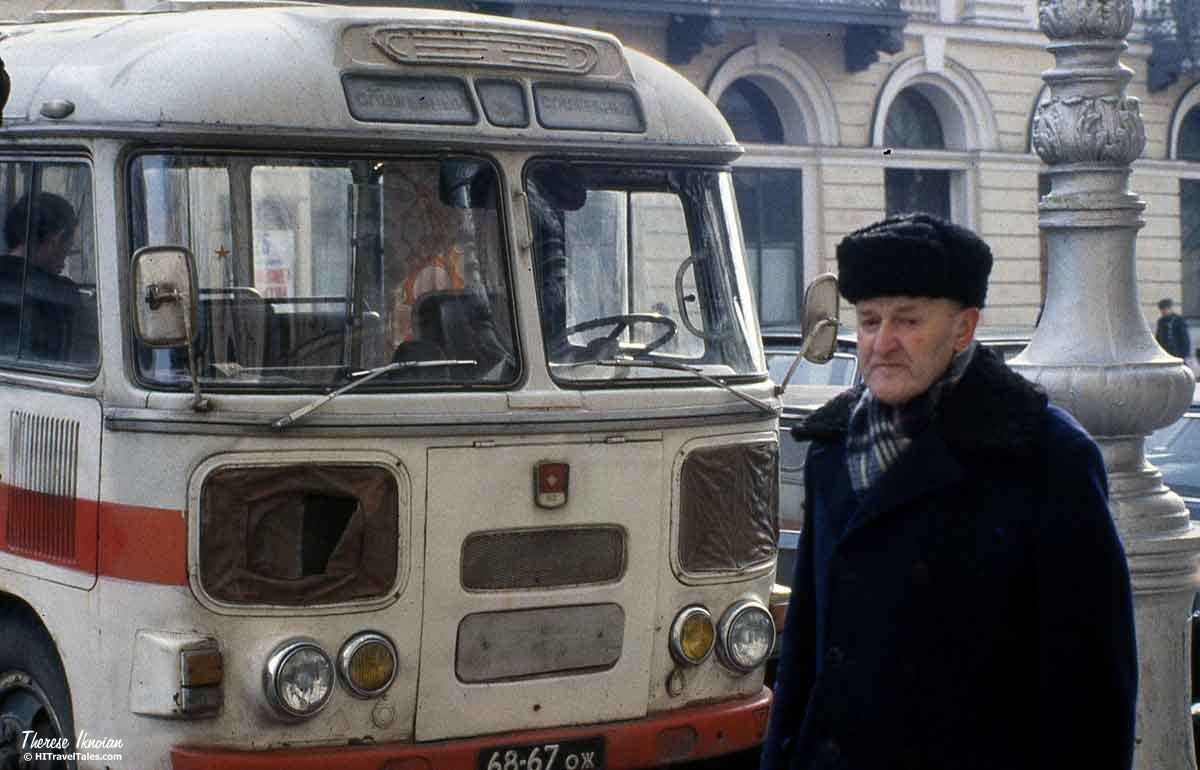
And then there is just the “reaction” of your action in taking travel photos. Both of us tend to keep our cameras on manual mode with the aperture and shutter speed preset for wherever we are (adjusting for the light outside or on a shadowy street or movement we anticipate seeing where we are). We never know if we’ll need or want to take a quick photo, but this way if suddenly a woman on a bike with a child on her shoulders whizzes by, we might be ready (not that we’ve seen that, per se). At least we know she have a chance of getting what we want without saying, “Could you just hold on a sec while I adjust?” You need to be ready and just click away. Another one of the key photography tips is, don’t over-contemplate. Back in 1984, Therese traveled through then-Leningrad (now St. Petersburg), snapping street scenes and people. To catch this, Therese had her camera preset and was ready to simply lift her camera and snap, catching the rickety bus as this man gave her a sideways glance.
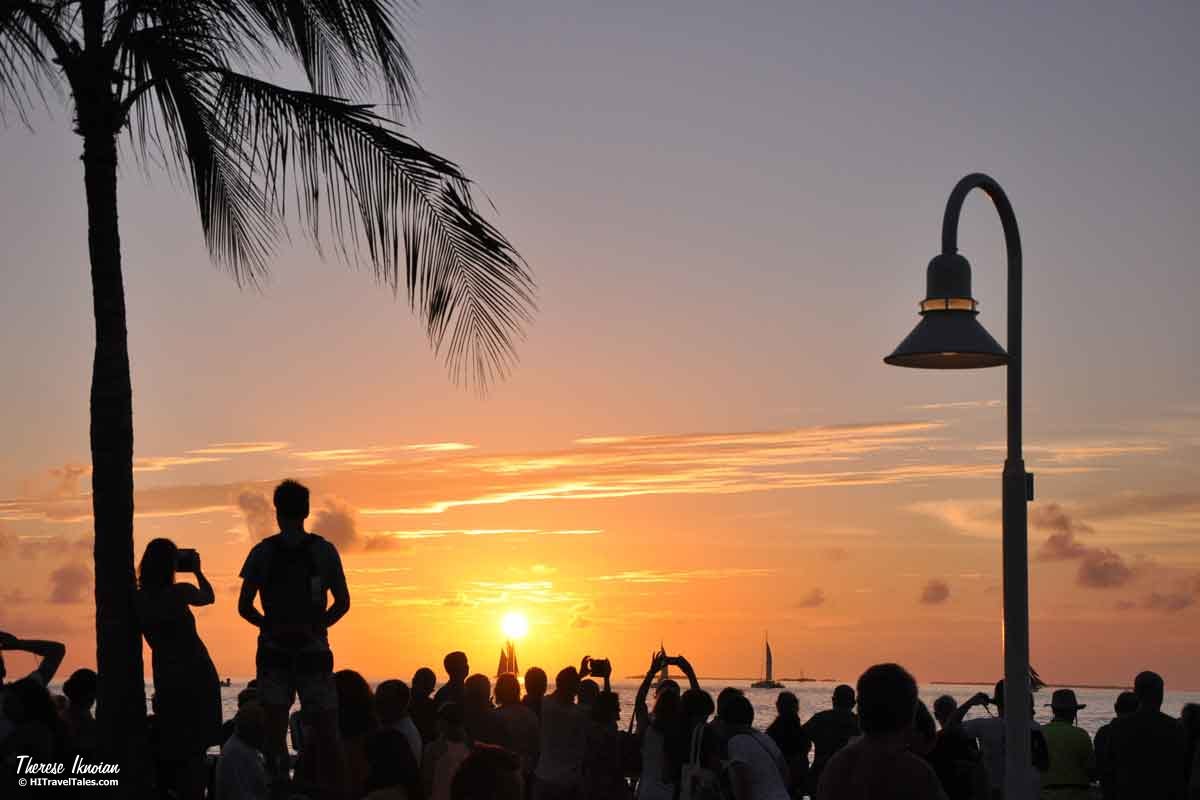
Get up, down, all around
Ever watch most people taking photos? They stop and snap, usually standing with camera at eye level. The world is not always best seen at your personal eye level. For example, you can make a child seem bigger by getting lower, squat in a flower field to feel a part of the scene, find a better perspective with the shadows by climbing on a wall or bench. Even consider lying on the ground -- Therese very rarely takes a photo at her eye level unless it’s more of what she calls a snapshot. The Sunset Celebration in Key West, Florida, is a nightly all-comers party on the ocean, with vendors selling drinks and trinkets. Visitors and residents alike show up early and pack the rail to watch the sun drop below the horizon. We didn’t arrive early, so a rail-side position was not possible on our November visit. As the sun set, Therese heaved herself up on a tall brick planter box to put herself above heads (but not exclude that scene). She got a few shots before a security guard ordered her to get down!
Move
Now that you are getting down and climbing high, another one of our photography tips is to do the hokey-pokey to the right or left. Unlike those figurative people you see who stand as if glued in place snapping a scene precisely from where they first saw it. Sometimes that works out great; sometimes if you sauntered one way or the other, the scene that caught your eye would be even better – or that move would eliminate something like an ugly building or a store sign that distracts. We’d rather eliminate or add something to a photo in the camera rather than rely on post-processing! Call us lazy…. we call it efficient.
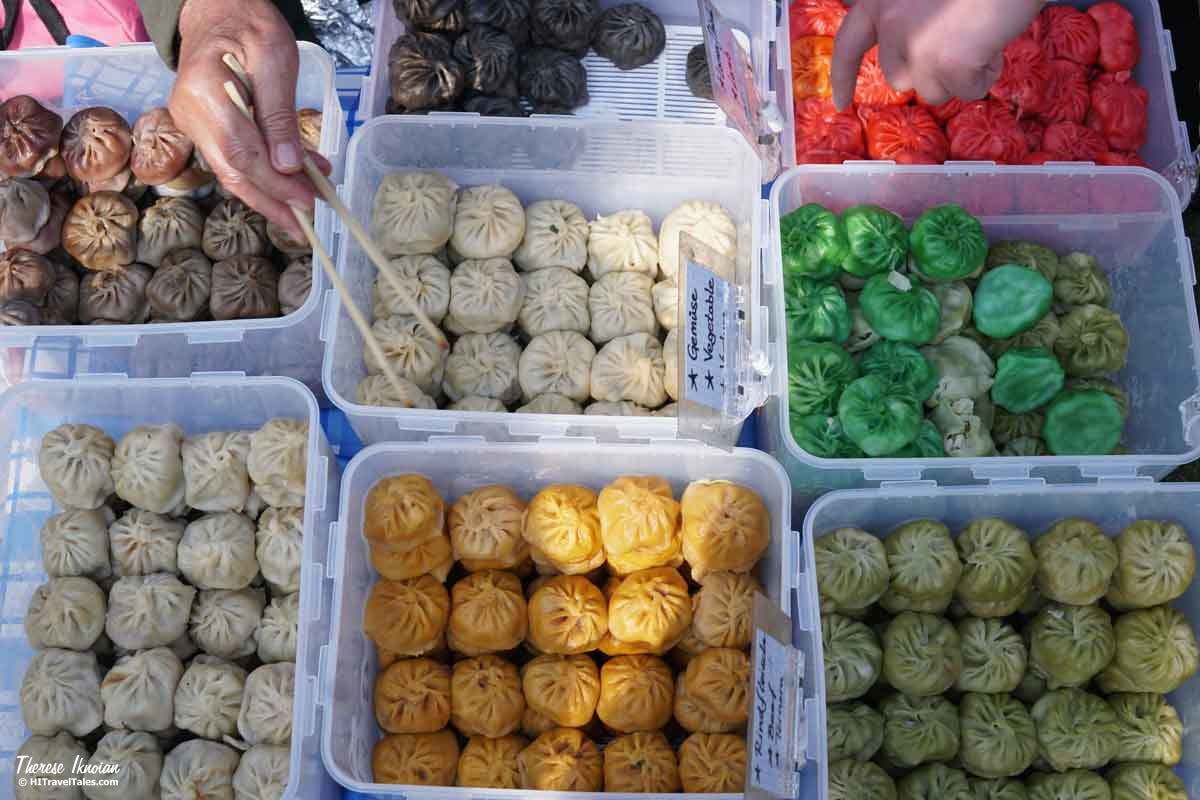
At this market in Berlin, Germany, called Thai Meadow, Therese moved around people standing in line to cut out faces, toes and legs she might otherwise have to process out. She then sidled up next to the boxes of colorful dumplings being sold by a vendor there and moved in closer to cut out the table edges and his legs where he sat beside the offering.
Interact
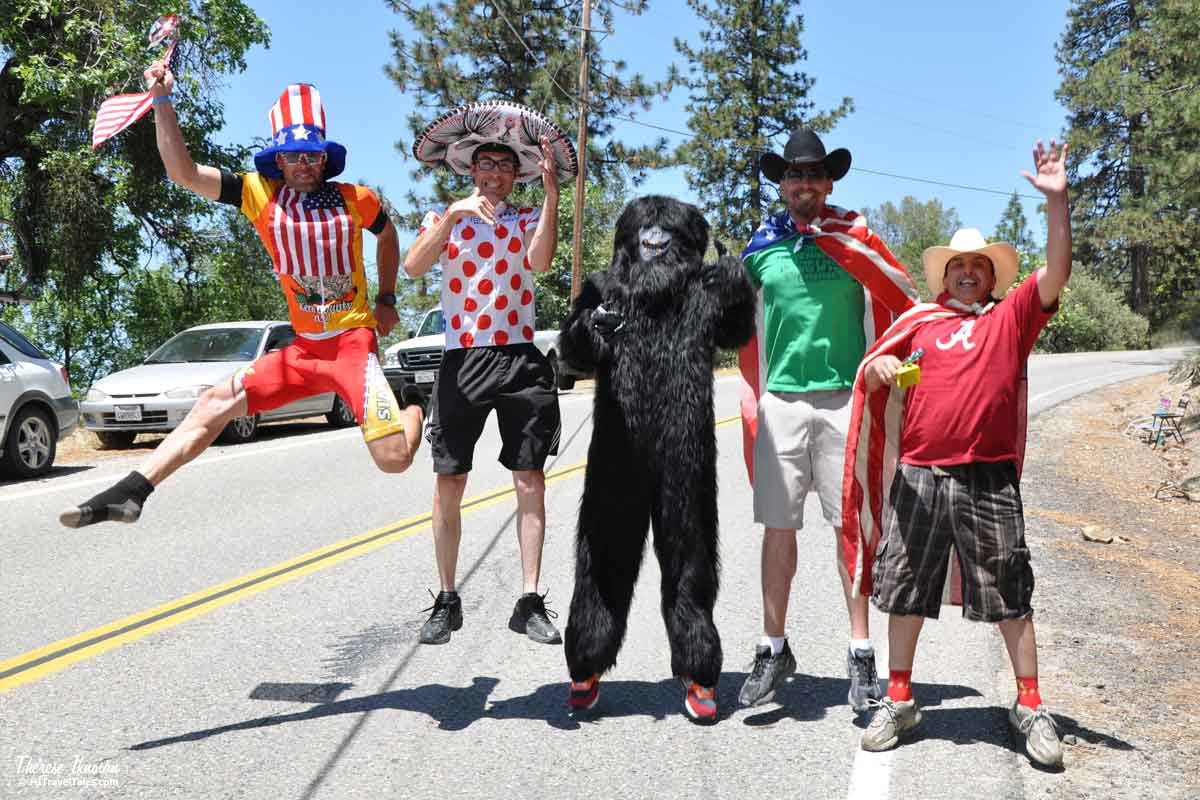
Everybody’s taste is different. Therese sometimes likes it when a subject interacts with the camera. It can be goofy, it can be endearing, it can help bring you into their world. She has been known to cluck at a dog or cat so they come toward her, wave at somebody in a window, or talk to a person so they look at her (Note: Making noises and trying to entice wildlife to come closer or look at you is NEVER ok). Now, you may not get what you want. The look may be askew or a hat may suddenly cover a face, but it’s always worth a try, and, as another of our street photography tips, it’s particularly good to try after you managed a few good shots before any interaction. Therese drove to Oakhurst, Calif., to watch the Amgen Tour of California bike race in May 2012, but shots of cyclists whipping past are a dime a dozen, so she went for the goofy fans. She raised her camera and waved her hands at this group, telling them to jump. This was the result! In fact, the photographer from the local paper took a photo of her taking a photo, which ran in the paper the next day!
Observe
Let’s say you are hanging out in a café and you notice a window across the street. Suddenly, it’s opened and out pops a head to hang laundry on a line above. And you missed the shot. Well, now, that’s something that might happen the next morning, right? Be there. Or how about a reflection at a certain time of day that is gone in a flash? Note the time and make a plan to return to get the shot. Even if you don’t have your camera with you, keep your photographer’s eye open. Sometimes travel and street photos happen in a blink of an eye, but sometimes you can observe a scene and be there, ready for it next time.
Michael noted a beautiful sunrise over Lake Shelby when he was staying at the Eagle Cottages at Gulf State Park in Gulf Shores, Alabama. At the time, he was too far away shooting another photo, but made a mental note of the time and sun position and was ready and in position for this shot with the warm light and starburst the very next morning.

Think small
Big gorgeous landscapes or sprawling urban scenes can sometimes be difficult to make look like more than a postcard expanse. Therese finds herself often drawn to the small stuff – a lock on a door, part of a boat on the lake, a log with some ripples around it, a cup on a counter – and sometimes that small detail can tell the whole story. OK, OK, sometimes that sprawl or expanse in its “sprawli-ness” and expansiveness is precisely what the doctor ordered if you are indeed trying to capture that feeling. But thinking small can be really big.
Cycling along the Moselle River in Metz, France in June, Therese suddenly came across this fluffy white stuff caught among the weeds and flowers beside the river. It was everywhere, but she got down and got up close, which she thought was much more magical than an expansive image. She found out this fluff comes from cottonwood trees during a short season.

Wait
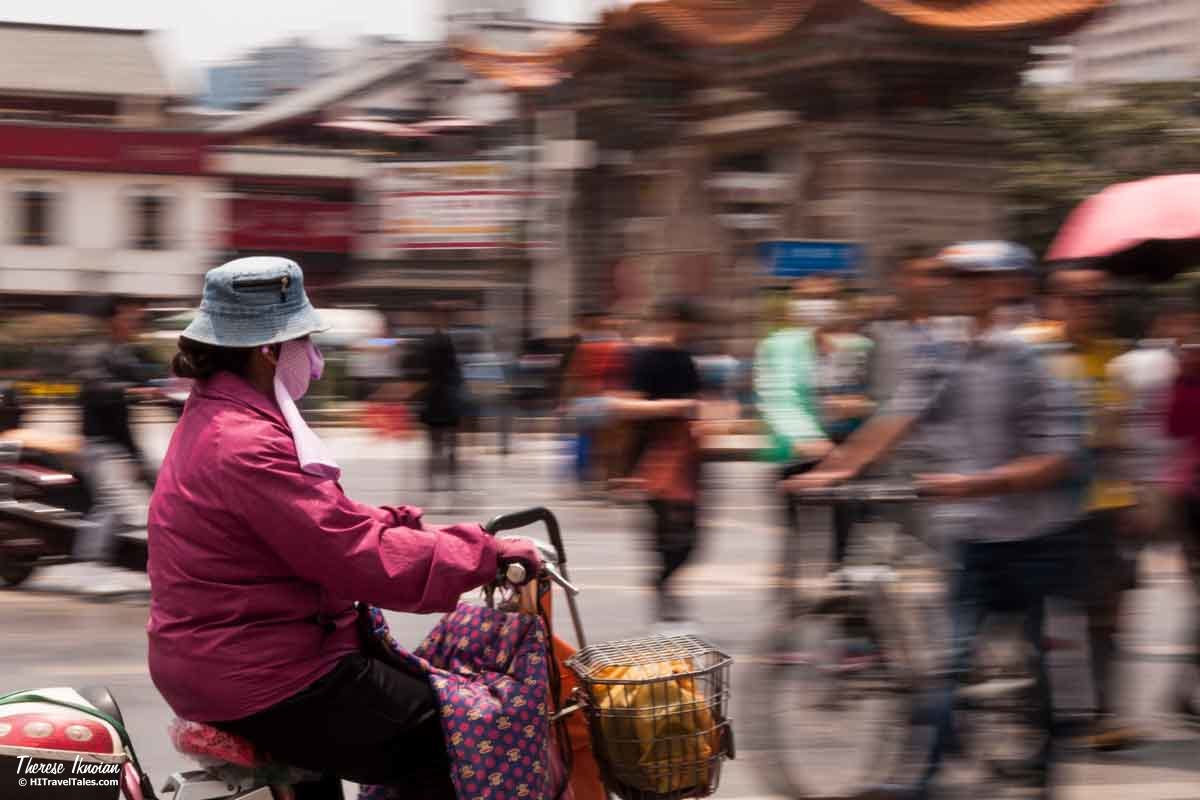
We like waiting. Sometimes you see a scene and think, “oh wow!” and just snap. Sometimes it makes for a better photo if you see the scene (go ahead and snap if you want for fun) and then wait. Wait for a pedestrian to be in the right place in front of a church, wait for a bird to fly in front of the trees, wait for the lady selling apples to turn her head just right, or maybe wait for the wind to push ripples across a pond. Waiting has its rewards in often improved composition and character. The sensory overload of street scenes in China leaves you mostly overwhelmed. With a temple gate in the background in Kunming, China, Therese waited for cyclists to roar past, working to pan with them to put the background in blur, creating visual interest out of an otherwise overwhelmingly cluttered scene.
— Story by Therese Iknoian and Michael Hodgson
Love this post. Thank you.